The best way to describe Filament.ca clear filament is a frosted white. It is not transparent like glass. There is a very, very slight yellowish tint to it that is common to all clear PLA. But it's very little and not as much as most: I am quite impressed. Printed parts look much like the filament on the roll except they are more shiny. The walls of parts printed at 0.02mm layer height have a satin finish that is very beautiful. Because the filament is not entirely clear internal part structure such as fill etc. is only slightly visible. Again the effect is pleasing.
After receiving my PLA I was eager to test it on glass with various treatments with the ultimate goal being to print directly to bare heated glass without any tape, glue, etc. Ever since learning that *natural PLA can be printed directly to bare heated glass without any treatment at all other than being squeaky clean I try to do this with all the different PLA I buy. Sometime it is possible and sometimes not. So far in my experience natural PLA (as opposed to colored PLA) is easiest to print to bare glass.
There are many reasons to like printing to bare glass. Parts have perfectly smooth, shiny and flat bottoms without the texture caused by blue tape or the dull finish that can result from using hair spray. It is faster to clean bare glass than apply coatings or tape. Also cheaper since common white vinegar is cheap. there is also less stuff to store etc. (but let's face it: if you are a maker you probably have too many tools etc. crowding your workspace anyway so what's a few more items? They might come in handy sometime. :-)).
Reasons not to like printing to heated glass are not having a heated bed in the first place, the heat-up and cool-down time involved, additional heat generation in a small office in summer, and the extra power consumption (which I assume is negligible).
So, before attempting printing to heated glass measure the filament diameter, calibrate the printer E-steps/mm, plug these numbers into your slicer, make sure the build surface is perfectly level and the Z height is exact. If any of these are wrong the print might fail. Clean the glass with vinegar and common kitchen towel till it squeaks. I scrub back and forth with a small soaked section of paper towel and make sure to not contaminate the center of the glass with wipes from the outside in that may contain traces of some residue. I haven't decided whether I like leaving the glass surface wet with vinegar or dry.
As a note for my testing I used KISSlicer (as of this writing Jonathan is back and working on his awesome slicer), Slic3r and Skeinforge. My printer is the Mendel90 from nophead.
But, before getting the PLA to print on glass I tried a number of traditional build surfaces.
PVA Glue (diluted with water)
My machine was setup with a 1.9mm thick glass plate coated with PVA glue so that's what I tried first. After trying a number of extruder and bed temperatures the best adhesion I got was at 200-220/70C. I wasn't overly impressed with how the part adhered. The corners of the part did tend to lift a little and that wasn't the result I wanted. Subsequent tests at 200/90C were not impressive either. Lowering the bed temperature to 50-60 was so-so but I think if I used a brim the results might have been passable.
ELMER'S CLEAR GLUE
On to glass coated with Elmer's Clear glue. I got pretty good prints at 220/70C on glass coated with the Elmer's Clear glue. They were good parts but after reading someone who said they cranked up temps on the heat bed I had to try. At 200/95 the part bottom was basically perfectly flat from corner to corner. Same for 200/100. BUT This seems WAY TOO HOT for PLA - and it has me questioning my thermistor reading (I have ordered a temperature reading gun but I can say the bed feels hot just by placing a hand above it). The skirt sticks better from the start the hotter the heat bed is. Out of curiosity I cranked the bed temp up even more just to see what would happen. At 105 the temp seems to high as the PLA seems to lose adhesion due to it being gooey and the bottom corners begin to let go a bit. The Elmer's Clear seems indestructible and I am thinking I could get huge amounts of printing out of one application.
KAPTON TAPE
Kapton tape at a range of temperatures did not work well for me. 6mm holes on the bottom of a small mechanical part would not print. Maybe I didn't try it as much as the other surfaces because I just don't like putting it on and it is easily damaged when removing parts. There are easier, better, more reliable ways to print PLA I think.
HAIR SPRAY
Hair spray - specifically L'Oreal Elnett Satin Extra Strong Hold (blue band at the top of the can) - this worked very well. The part adhered well and was difficult to remove even when the glass cooled. Again hotter glass temps were the ticket for me: 200/90C. Dropping the bed temperature didn't work for me: if I did the parts let lose. Again, I know this goes against common knowledge that PLA doesn't require this hot a bed; all I can say is that a 90C bed works best for me. And since I don't have a heat gun yet to test that the glass surface is within 15C of the thermistor reading I will keep repeating the 90C number. The hair spray will leave a dull finish on the bottom of the part.
UHU GLUE STICK
This worked very well. The glue stick is easy to apply and you don't need much; just and even smudge worked well. I printed two small to medium sized parts with it and they both stuck well. For this a heated bed is not needed. I'm not even sure a heated bed would be of any benefit.
BLUE PAINTER'S TAPE
For this round of testing I did not attempt to print on the venerable blue tape because it's pretty much a forgone conclusion that this PLA will stick to it. I don't plan to use it in the future if bare glass will work. But for the largest or warp-prone parts this might be the answer. In the worst case scenario wipe the top of the tape lightly with acetone to remove some wax from the tape surface. Beware: the part will likely stick so well to it that the blue tape will have to be removed from the glass with the part.
BARE GLASS
Finally after a bit of practice I was able to print a medium sized bar clamp perfectly on bare heated glass. I sliced the part with KISSlicer at 25mm/sec and 200/90 again. The part bottom is like glass all the way across. Only when the thermistor read 38-35C did the part begin to crack and pop as it came unstuck from the glass. It was still work to pop it from the glass with a sharp putty scraper! I consider this a total success. If I am being picky though I could complain just a bit because the first layer is a wee bit flared a bit due the lower viscosity of the PLA being squirted from a hot extruder to hot glass.
However, I still experienced some lifting with the bare glass on some objects. For example the teeth on a large gear I sliced with Skeinforge lifted slightly. I sliced the same gear with Slic3r and used a 0.96mm brim and the teeth did not lift at all. So the brim tamed the lifting.
The recipe that is working on my Mendel90 with J-Head hotend printing on bare glass is to print the PLA at 200/90C at 25mm/sec. Using brim ensures the best part adhesion to the bed. Slic3r and Skeinforge (Skeinforge needs a plugin) have it. KISSlicer doesn't but I am hoping to see it in the future. Higher or lower speeds may work but slower at least for the first layer is best.
CONCLUSION
In conclusion I like this filament a lot.
*Colored PLA has pigments in it which may or may not stop it from adhering to bare glass. And various PLA brands vary widely in quality so this will affect their adhesion as well.
Written by a Filaments.ca customer
A Clamp - Printed using the Natural/Translucent PLA filament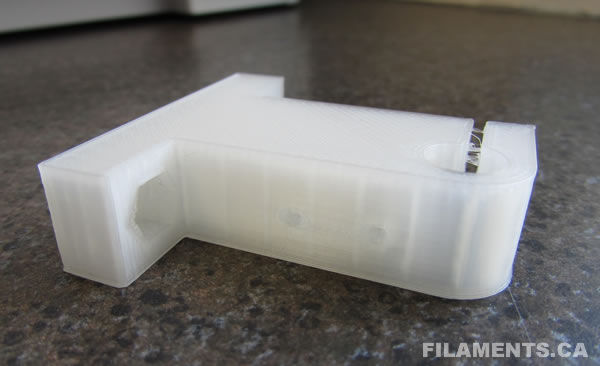
A Large Gear - Printed using the Natural/Translucent PLA filament


Misc. Parts - Printed using the Natural/Translucent PLA filament


